How to draw a tree, step by step
Six simple steps · best for ages 3–6 · free to print
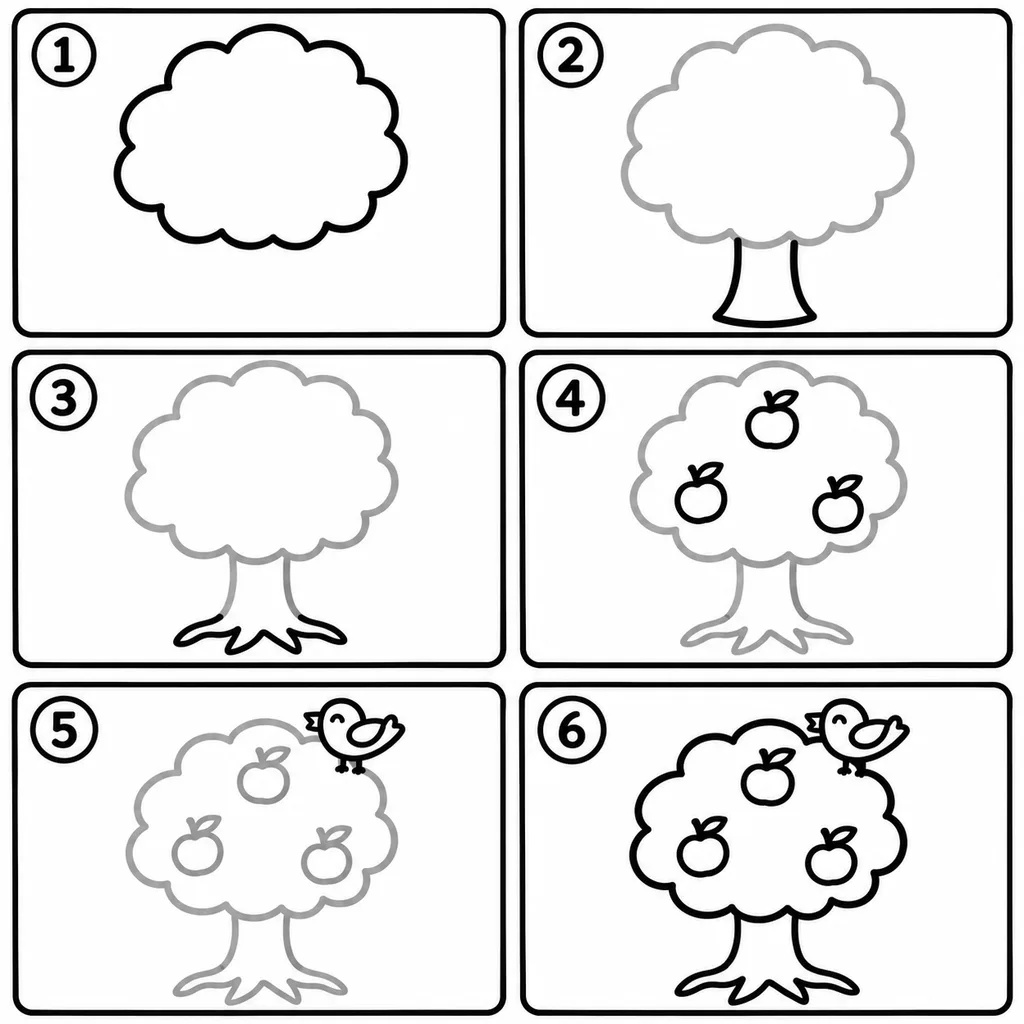
The steps in words
- Draw a big cloud shape with rounded edges. This is the treetop.
- Under it, draw a trunk: two lines that widen a little at the bottom.
- At the bottom of the trunk, add roots that spread out to the sides like fingers.
- Inside the treetop, draw three round fruits, each with a little leaf.
- On top of the tree, draw a small, smiling bird.
- Go over all the lines in black. The tree is ready!
Tip: Swap the fruit for oranges, pomegranates or almond blossoms, and you get a different tree every time.
🌳 Tree coloring pages, ready to color
More step-by-step drawings


Frequently asked questions
How many steps does it take to draw a tree?
Six steps. The first: Draw a big cloud shape with rounded edges. This is the treetop. The last: Go over all the lines in black. The tree is ready!
What age is the tree drawing for?
It suits kids aged 3–6 best. Swap the fruit for oranges, pomegranates or almond blossoms, and you get a different tree every time.
How do I print the page?
Press "Print or download PDF". The page opens in an A4 preview, ready to print or save as a PDF. On US Letter paper, choose "Fit to page" in the print settings.
Explore more: All how-to-draw pages, Tree coloring pages, Coloring pages, and Color by number.