How to draw a butterfly, step by step
Six simple steps · best for ages 4–8 · free to print
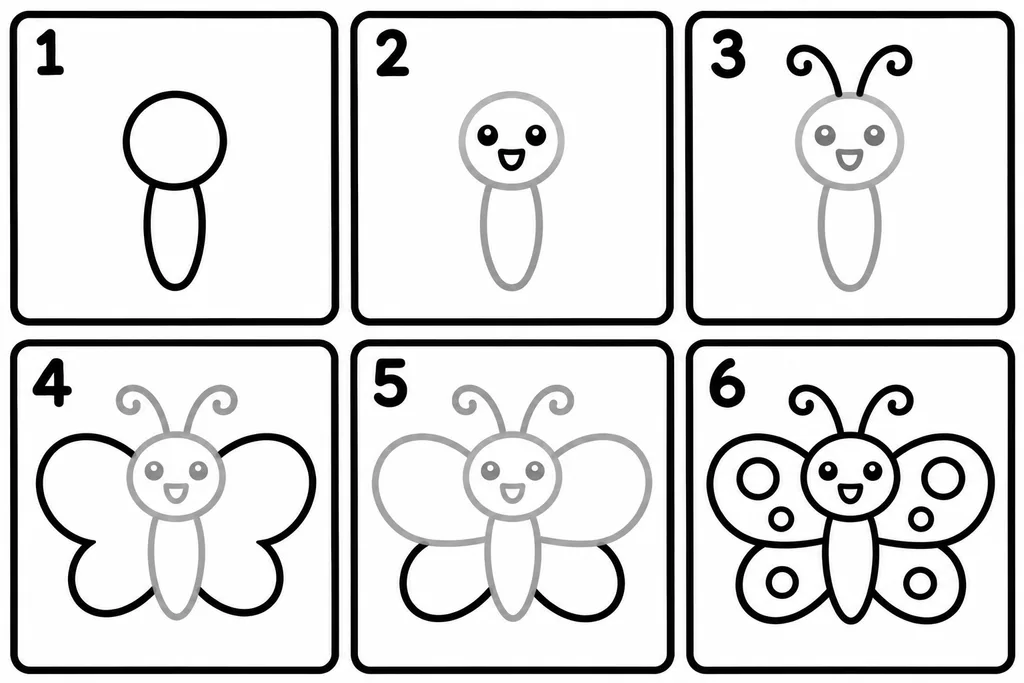
The steps in words
- Draw a circle for the head and a long oval under it for the body.
- Draw two eyes and a smiling mouth inside the head.
- Add two curly antennae above the head.
- Draw big wings on both sides: large ones on top, smaller ones below.
- On each side, draw a line between the top wing and the bottom wing.
- Decorate the wings with matching circles on both sides.
Tip: A butterfly is symmetrical: every circle you draw on one wing goes on the other wing too.
🦋 Butterfly coloring pages, ready to color
More step-by-step drawings
Frequently asked questions
How many steps does it take to draw a butterfly?
Six steps. The first: Draw a circle for the head and a long oval under it for the body. The last: Decorate the wings with matching circles on both sides.
What age is the butterfly drawing for?
It suits kids aged 4–8 best. A butterfly is symmetrical: every circle you draw on one wing goes on the other wing too.
How do I print the page?
Press "Print or download PDF". The page opens in an A4 preview, ready to print or save as a PDF. On US Letter paper, choose "Fit to page" in the print settings.
Explore more: All how-to-draw pages, Butterfly coloring pages, Coloring pages, and Color by number.