How to draw an olive branch, step by step
Six simple steps · best for ages 4–7 · free to print
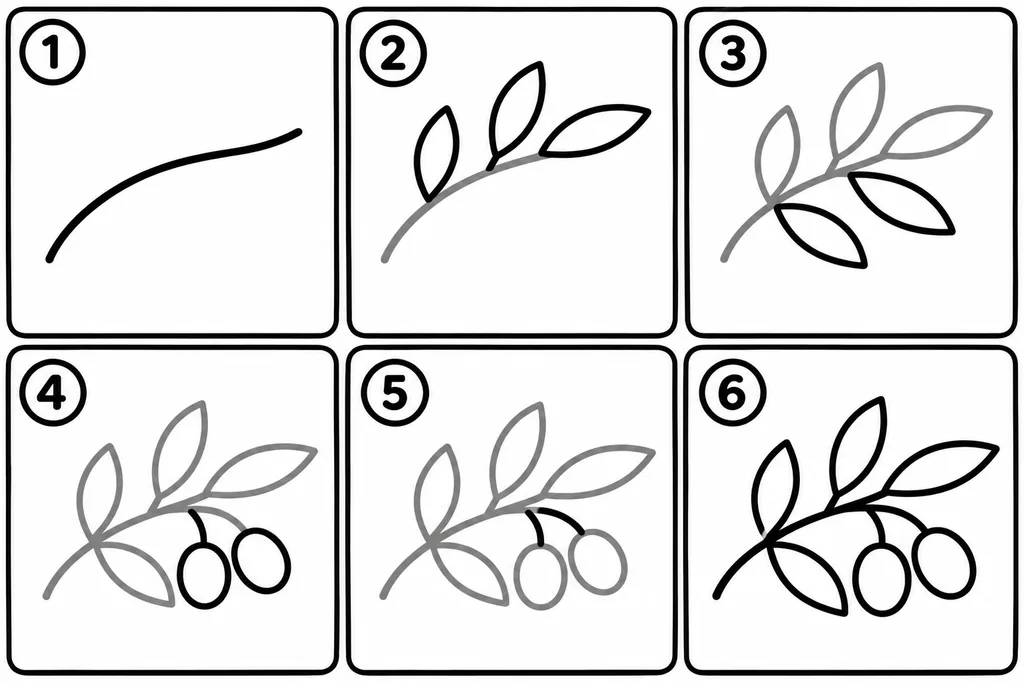
The steps in words
- Draw a long curved line. This is the branch.
- On one side of the branch, draw narrow pointy leaves.
- Add narrow leaves on the other side too.
- Under the leaves, draw small oval olives.
- Connect each olive to the branch with a short stem.
- Go over the branch, the leaves and the olives in black.
Tip: Color the leaves dark green and the olives light green or dark purple.
More step-by-step drawings


Frequently asked questions
How many steps does it take to draw an olive branch?
Six steps. The first: Draw a long curved line. This is the branch. The last: Go over the branch, the leaves and the olives in black.
What age is the olive branch drawing for?
It suits kids aged 4–7 best. Color the leaves dark green and the olives light green or dark purple.
How do I print the page?
Press "Print or download PDF". The page opens in an A4 preview, ready to print or save as a PDF. On US Letter paper, choose "Fit to page" in the print settings.
Explore more: All how-to-draw pages, Coloring pages, and Color by number.