How to draw a mushroom, step by step
Six simple steps · best for ages 3–6 · free to print
The steps in words
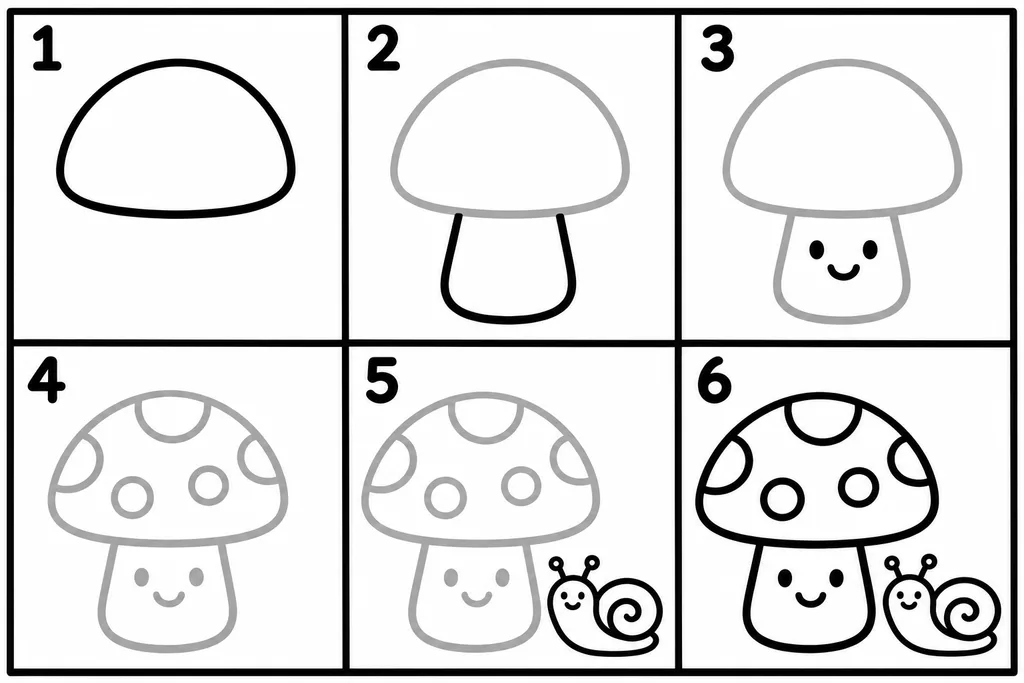
- Draw a big half circle with a rounded bottom. This is the cap.
- Under the cap, draw a wide stalk that curves at the bottom.
- Draw two eyes and a little smile on the stalk.
- Add round spots on the cap: two in the middle and three at the edges.
- Next to the mushroom, draw a little snail with a curly shell and two feelers.
- Go over all the lines in black. The mushroom is ready to color!
Tip: In the drawing the mushroom is smiling, but in real life we never eat mushrooms we find outside without a grown-up who knows them well.
More step-by-step drawings

Frequently asked questions
How many steps does it take to draw a mushroom?
Six steps. The first: Draw a big half circle with a rounded bottom. This is the cap. The last: Go over all the lines in black. The mushroom is ready to color!
What age is the mushroom drawing for?
It suits kids aged 3–6 best. In the drawing the mushroom is smiling, but in real life we never eat mushrooms we find outside without a grown-up who knows them well.
How do I print the page?
Press "Print or download PDF". The page opens in an A4 preview, ready to print or save as a PDF. On US Letter paper, choose "Fit to page" in the print settings.
Explore more: All how-to-draw pages, Coloring pages, and Color by number.