How to draw a flying saucer, step by step
Six simple steps · best for ages 4–7 · free to print
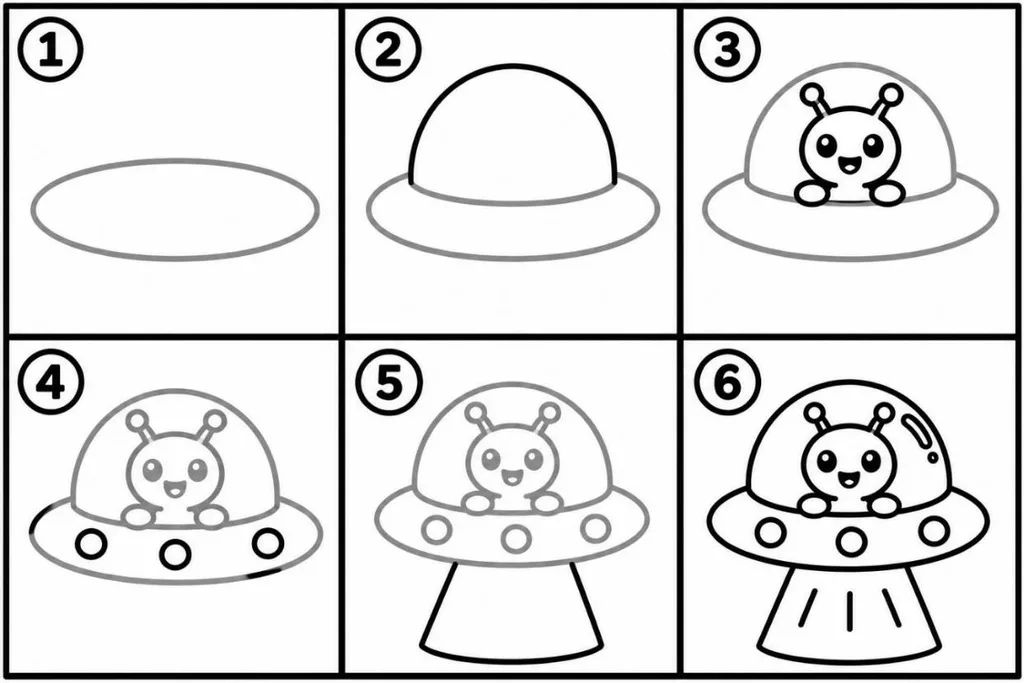
The steps in words
- Draw a wide, flat oval. This is the saucer.
- Above the oval, draw a big arch: the glass dome.
- Inside the dome, draw a little alien: a round head, two antennae, eyes and a smile.
- Add three small circles on the saucer for lights.
- Under the saucer, draw a wide shape like a triangle with its tip cut off: the beam of light.
- Add lines in the beam and a shine on the dome, then go over everything in black.
Tip: Put a little cow or a waving child inside the beam, and tell a story about where the saucer is going.
🛸 Flying saucer coloring pages, ready to color
More step-by-step drawings


Frequently asked questions
How many steps does it take to draw a flying saucer?
Six steps. The first: Draw a wide, flat oval. This is the saucer. The last: Add lines in the beam and a shine on the dome, then go over everything in black.
What age is the flying saucer drawing for?
It suits kids aged 4–7 best. Put a little cow or a waving child inside the beam, and tell a story about where the saucer is going.
How do I print the page?
Press "Print or download PDF". The page opens in an A4 preview, ready to print or save as a PDF. On US Letter paper, choose "Fit to page" in the print settings.
Explore more: All how-to-draw pages, Flying saucer coloring pages, Coloring pages, and Color by number.